Enrole your Windows 10 into the ESU program, even when the Enrole function is not there

So you want have another year of Windows 10 updates?,

First thing make sure that you have downloaded all updates and that Windows 10

start Registry Editor and go to the following path

HKEY_CURRENT_USER\SOFTWARE\Microsoft\WindowsNT\CurrentVersion\Windows

look for the ConsumerESU key if it’s missing create it (rightclick the Windows key and select New -> Key) name the key

ConsumerESU

if you had to create the ConsumerESU key you will also need to create the 2 DWORD (32-bit) Value (right click in the folder and select New -> DWORD (32-bit) Value) otherwise simply just change the values as described below.

Create the first one

ESUEligibility

and set the value to 2 (Base should be Hexadecimal)

Next create the next DWORD (32-bit) Value) called

ESUEligibilityResult

and set the value to 1 (Base should be Hexadecimal)

close the Registry Editor and reboot your machine

next jump back to the Windows update and there should now be a “Enroll now” link, as seen below:


follow the, instructions and you should be good to go for October 13th 2026 for updates.

Checksum check of files with Windows Powershell

the simple solution without having to install anything is to use certutil from Powershell

certutil -hashfile <file> SHA256

certutil support the following hash algorithms: MD2 MD4 MD5 SHA1 SHA256 SHA384 SHA512.

example (iLO4 firmware file for HP Proliant Server):

PS D:\DL380Gen9\iLO> certutil -hashfile cp053895.exe SHA256
SHA256 hash of cp053895.exe:
3a35573541ce44e6fadde844a0d2cb31a5bae2a55e701e2ce9d3e77c61c01d5e
CertUtil: -hashfile command completed successfully.
PS D:\DL380Gen9\iLO>

the corrosponding value from HP says that it should be (SHA-256 Checksum):

3a35573541ce44e6fadde844a0d2cb31a5bae2a55e701e2ce9d3e77c61c01d5e

This is a simple way to verify that the files you downloaded or got is acctualy the real deal.

see more here: https://learn.microsoft.com/en-us/windows-server/administration/windows-commands/certutil


Surenoo LCD2USB LCD display in lcd4Linux

Some time ago i bough a 20×4 LCD display with an LCD2USB controller mounted from AliExpress (https://www.aliexpress.com/item/4000219655381.html).

My idea was to use this for an Openmediavault Server when i need to go to a LAN party, to prevent the need for a Monitor connected to the server i could use the display to show the IP and possible other usefull information, that could be handy.

Seems there is little information around the internet, about how to get one of these, displays working compared to back in the days.

Every note that i can locate says that when powering on the display from the USB port it should come up and say lcd2usb version x.xx but in my case the display is blank and looks to be more or less dead, in the beginning i was sure that i had bought a bad display, until i remembered that if the controller somehow was setup to keep the display in a low contrast and brightness in off mode, that would result in a display looking to be dead, so tweeking the contrast and brightness paramaters made the display come to life.

My lcd4linux.conf file:

Note: contrast and brightness are are still a work in progress, but it works.

Display LCD2USB {
Driver 'LCD2USB' #Model: LCD2USB
Size '20x4' #LCD dimension: 1602
# Port '/dev/usbdev3.2' #Port: /dev/usbdev3.2
Contrast 80
Brightness 40
icons 0
}

Widget IPaddress {
class 'Text' #Type: Text
expression netinfo::ipaddr('ens33') #eth0's ip
prefix 'IP:' #display "IP:"
width 16 #display width: 16
align 'C' #display: central
update 1000
}

Widget Time {
class 'Text'
expression strftime('%a %H:%M:%S',time())
width 16
align 'C'
update 1000
}

Layout Default {
Row1 {
Col1 'IPaddress' #Display Widget IPaddress in the first row and first column
}
Row2 {
Col1 'Time' #Display Widget Time in the second row and first column
}

}

Display 'LCD2USB'
Layout 'Default'

to test you can use the following command

root@Debian-test:/etc# lcd4linux -vv -F

the output should look something like this:

root@Debian-test:/etc# lcd4linux -vv -F
LCD4Linux 0.11.0-SVN-1193 starting
Dump of /etc/lcd4linux.conf:
Display 'LCD2USB'
Display:LCD2USB.Brightness 40
Display:LCD2USB.Contrast 80
Display:LCD2USB.Driver 'LCD2USB'
Display:LCD2USB.icons 0
Display:LCD2USB.Size '20x4'
Layout 'Default'
Layout:Default.Row1.Col1 'IPaddress'
Layout:Default.Row2.Col1 'Time'
Widget:IPaddress.align 'C'
Widget:IPaddress.class 'Text'
Widget:IPaddress.expression netinfo::ipaddr('ens33')
Widget:IPaddress.prefix 'IP:'
Widget:IPaddress.update 1000
Widget:IPaddress.width 16
Widget:Time.align 'C'
Widget:Time.class 'Text'
Widget:Time.expression strftime('%a %H:%M:%S',time())
Widget:Time.update 1000
Widget:Time.width 16

[DBus] Error connecting to the dbus session bus: Unable to autolaunch a dbus-daemon without a $DISPLAY for X11

plugin_mpd.c: [MPD] v0.83, check lcd4linux configuration file...
[MPD] WARNING: Plugin is not enabled! (set 'enabled 1' to enable this plugin)
[raspi] WARNING: Plugin is not enabled! (set 'enabled 1' to enable this plugin)
lcd4linux.c: initializing driver LCD2USB
LCD2USB: $Rev: 1130 $
LCD2USB: scanning USB for LCD2USB interface ...
LCD2USB: found LCD2USB interface on bus 001 device 008
LCD2USB: echo test successful
LCD2USB: firmware version 2.02
LCD2USB: installed controllers: CTRL0
initializing layout 'Default'
layout.c: Layout:Default: migrating 'row1.col1' to 'Layer:1.row1.col1'
layout.c: Layout:Default: migrating 'row2.col1' to 'Layer:1.row2.col1'
Creating new timer group (1000 ms)
widget 'IPaddress': Class 'text', Parent '<root>', Layer 1, Row 0, Col 0 (to 0,16)
widget 'Time': Class 'text', Parent '<root>', Layer 1, Row 1, Col 0 (to 1,16)
lcd4linux.c: starting main loop
Timer #0 skipped 31 interval(s) or 3100 ms.

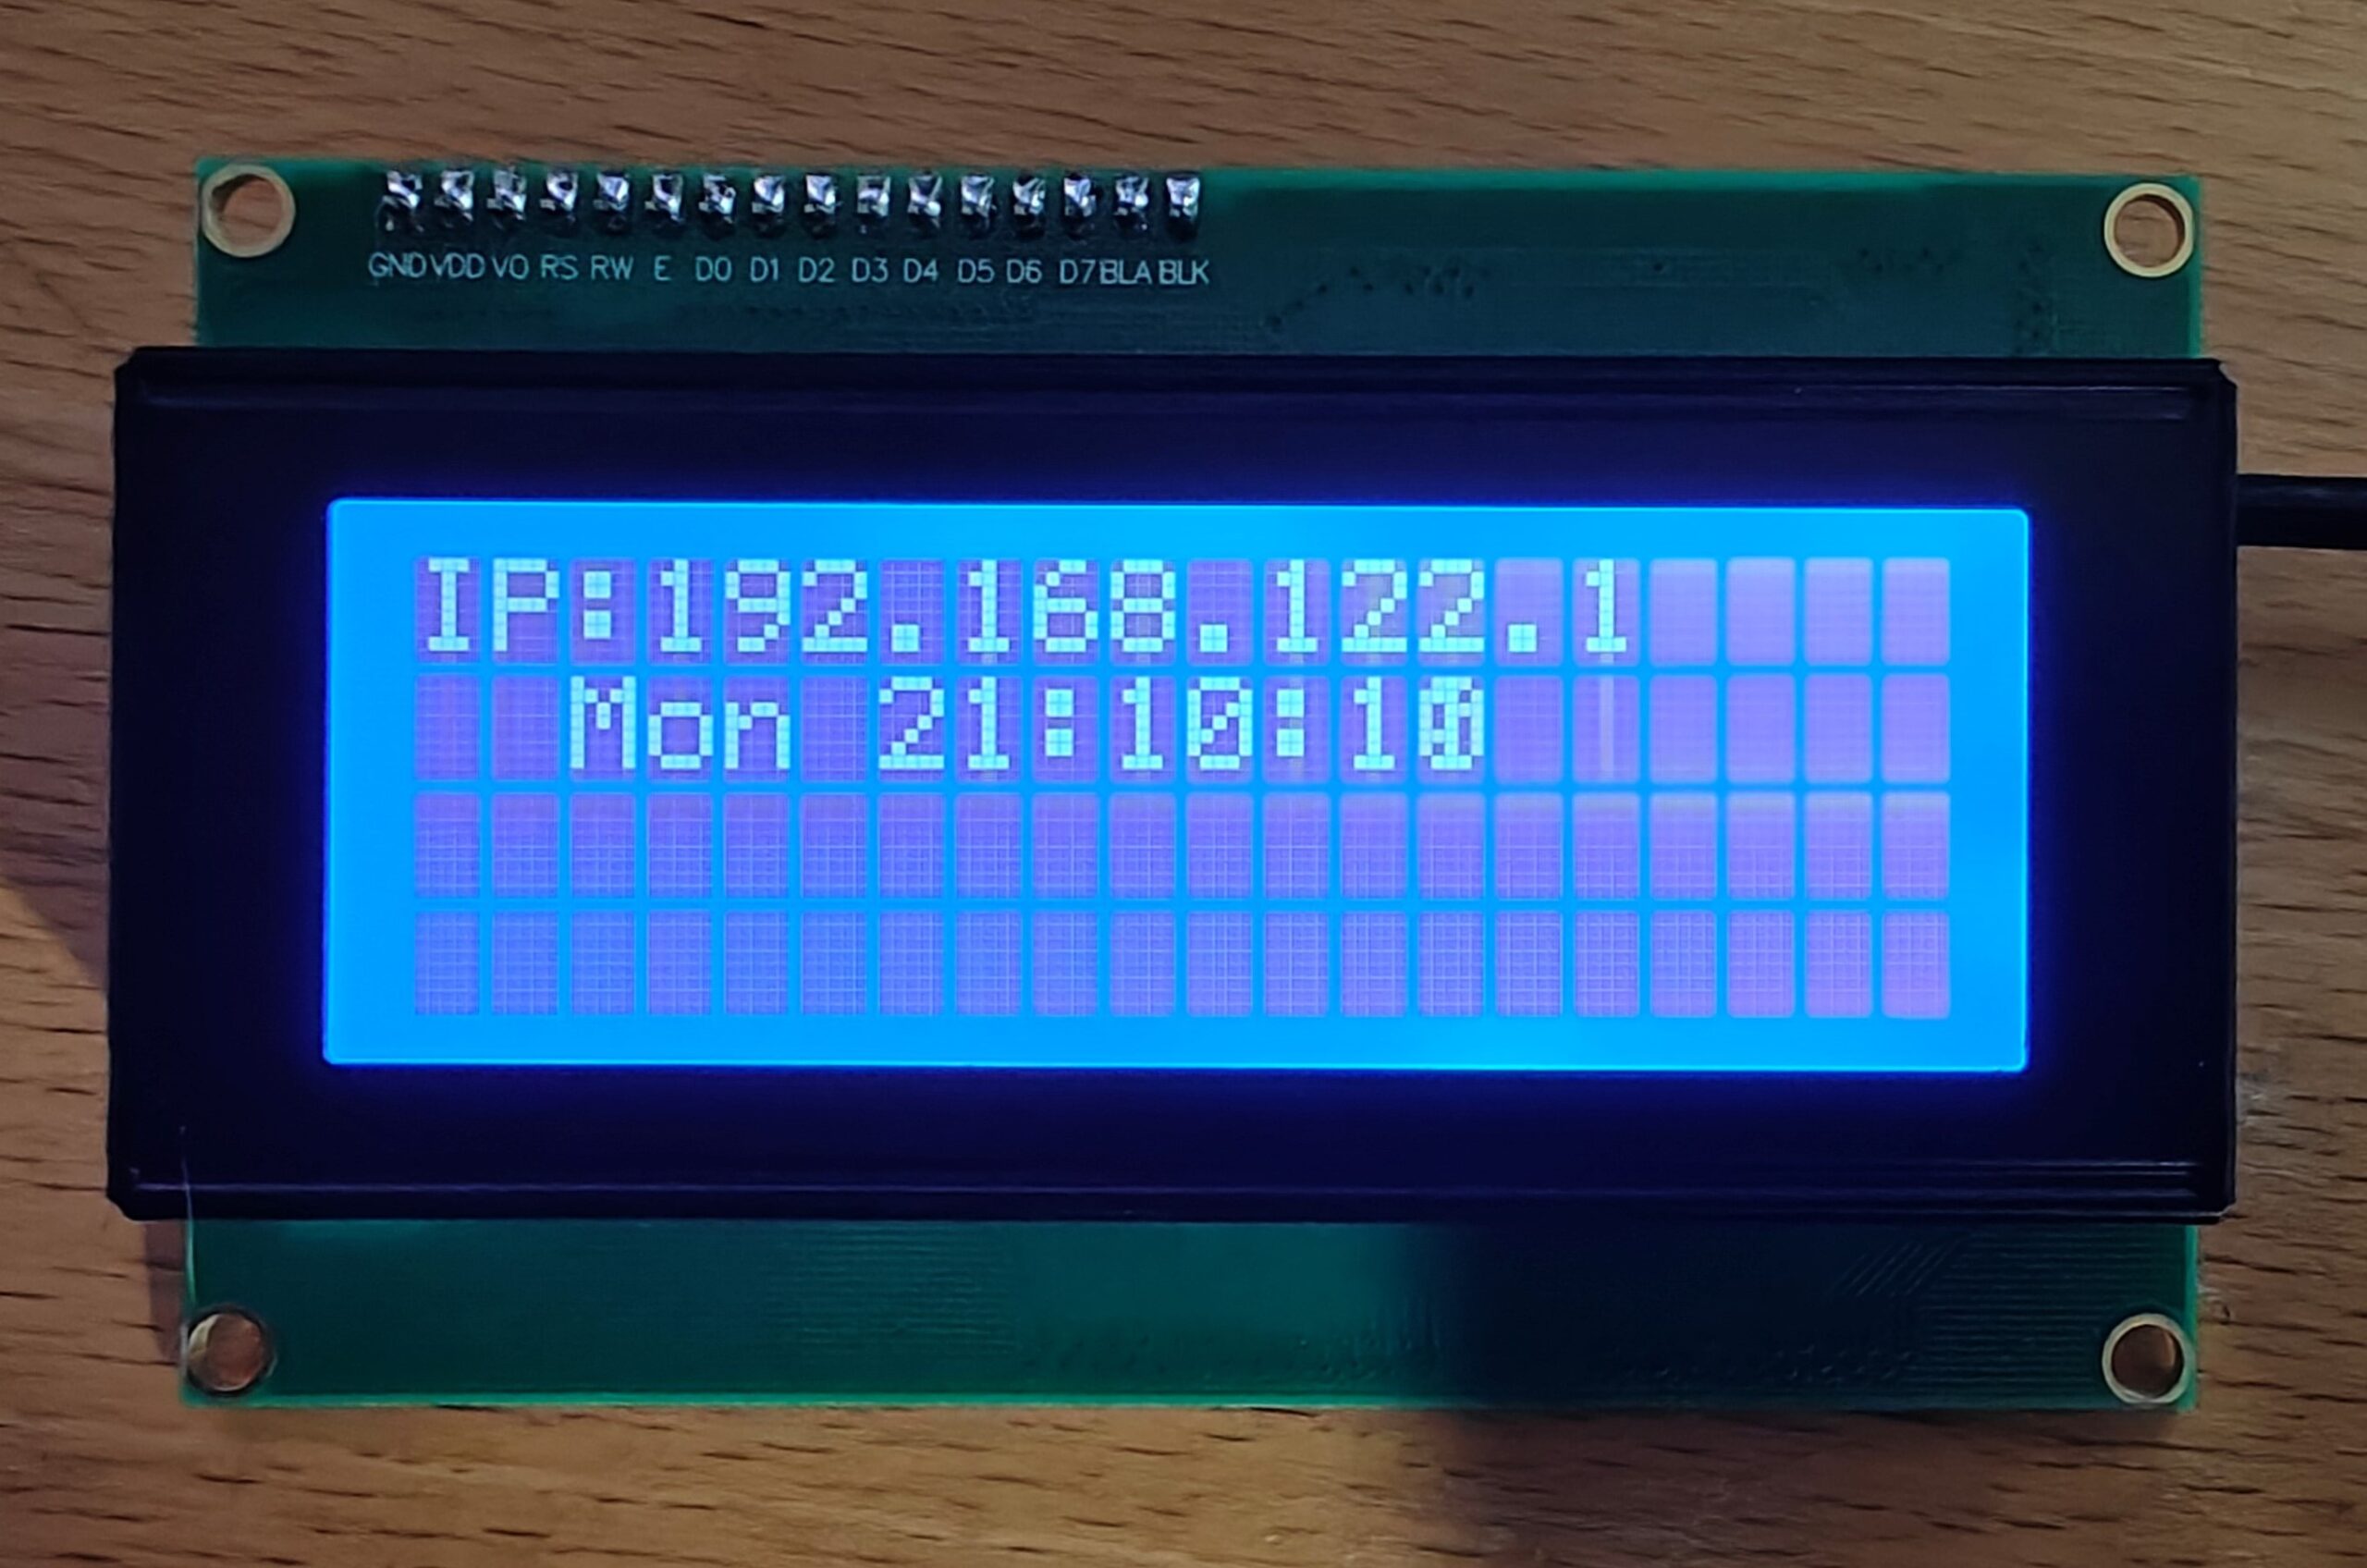
and tada!, the displays show information.

How to See Samba Shares on a Windows 10 Network

wsdd is a service by christgau on GitHub, which implements a Web Service Discovery host daemon for Ubuntu. This enables Samba hosts to be found by Web Service Discovery Clients like Windows 10.

If you are experiencing any issues with this service, please let us know in the comments or submit an issue on GitHub.

Change to /tmp directory.

cd /tmp

Download and unzip the archive.

wget https://github.com/christgau/wsdd/archive/master.zip

unzip master.zip

Rename wsdd.py to wsdd.

sudo mv wsdd-master/src/wsdd.py wsdd-master/src/wsdd

Copy to /usr/bin.

sudo cp wsdd-master/src/wsdd /usr/bin

Copy wsdd to /etc/systemd/system.

sudo cp wsdd-master/etc/systemd/wsdd.service /etc/systemd/system

Open wsdd.service in nano and comment out User=nobody and Group=nobody with a ; semicolon.

sudo nano /etc/systemd/system/wsdd.service
[Unit]
Description=Web Services Dynamic Discovery host daemon
; Start after the network has been configured
After=network-online.target
Wants=network-online.target
; It makes sense to have Samba running when wsdd starts, but is not required
;Wants=smb.service


[Service]
Type=simple
ExecStart=/usr/bin/wsdd --shortlog
; Replace those with an unprivledged user/group that matches your environment,
; like nobody/nogroup or daemon:daemon or a dedicated user for wsdd
; User=nobody
; Group=nobody
; The following lines can be used for a chroot execution of wsdd.
; Also append '--chroot /run/wsdd/chroot' to ExecStart to enable chrooting
;AmbientCapabilities=CAP_SYS_CHROOT
;ExecStartPre=/usr/bin/install -d -o nobody -g nobody -m 0700 /run/wsdd/chroot
;ExecStopPost=rmdir /run/wsdd/chroot


[Install]
WantedBy=multi-user.target

Save and exit (press CTRL + X, press Y and then press ENTER)

Start and enable wsdd.

sudo systemctl start wsdd
sudo systemctl enable wsdd

Output:

Created symlink /etc/systemd/system/multi-user.target.wants/wsdd.service → /etc/systemd/system/wsdd.service.

Now check that the service is running.

sudo service wsdd status

Output:

wsdd.service - Web Services Dynamic Discovery host daemon
Loaded: loaded (/etc/systemd/system/wsdd.service; enabled; vendor preset: enabled)
Active: active (running) since Wed 2020-06-10 10:51:39 CEST; 8s ago
Main PID: 40670 (python3)
Tasks: 1 (limit: 6662)
Memory: 10.8M
CGroup: /system.slice/wsdd.service
└─40670 python3 /usr/bin/wsdd --shortlog


jun 10 10:51:39 ubuntu systemd[1]: Started Web Services Dynamic Discovery host daemon.
jun 10 10:51:40 ubuntu wsdd[40670]: WARNING: no interface given, using all interfaces

You should now be able to browse your Ubuntu machines and Samba shares in the Windows 10 file explorer. You may need to restart the Windows 10 machines to force discovery.

You may also want to reboot the Ubuntu server just to make sure the wsdd service starts up automatically without issue.
How to Uninstall wsdd

If you want to completely uninstall wsdd, stop and disable the service.

sudo systemctl stop wsdd
sudo systemctl disable wsdd

Remove wsdd from /usr/bin.

sudo rm /usr/bin/wsdd

Remove service file.

sudo rm /etc/systemd/system/wsdd.service

Figuring out what hardware version of the Raspberry Pi you are using

So you are spending the night messing around with your Raspberry Pi’s and forgotten what version you are using, instead of having to take the cover of the RPi or walk over to the closet, to see what version it is, you can do this remote from the command line.

From the command line issue the following command:

cat /proc/cpuinfo

output should be something like this:

processor       : 3
model name      : ARMv7 Processor rev 4 (v7l)
BogoMIPS        : 38.40
Features        : half thumb fastmult vfp edsp neon vfpv3 tls vfpv4 
CPU implementer : 0x41
CPU architecture: 7
CPU variant     : 0x0
CPU part        : 0xd03
CPU revision    : 4

Hardware        : BCM2835
Revision        : a02082
Serial          : 0000000000000000
pi@bifrost:~ $

look for the part in the bottom saying Revision (in my case it’s a02082)

now use the following list to fire out what hardware it is.:

Code Model Revision RAM Manufacturer

900021

A+

1.1

512MB

Sony UK

900032

B+

1.2

512MB

Sony UK

900092

Zero

1.2

512MB

Sony UK

900093

Zero

1.3

512MB

Sony UK

9000c1

Zero W

1.1

512MB

Sony UK

9020e0

3A+

1.0

512MB

Sony UK

920092

Zero

1.2

512MB

Embest

920093

Zero

1.3

512MB

Embest

900061

CM

1.1

512MB

Sony UK

a01040

2B

1.0

1GB

Sony UK

a01041

2B

1.1

1GB

Sony UK

a02082

3B

1.2

1GB

Sony UK

a020a0

CM3

1.0

1GB

Sony UK

a020d3

3B+

1.3

1GB

Sony UK

a02042

2B (with BCM2837)

1.2

1GB

Sony UK

a21041

2B

1.1

1GB

Embest

a22042

2B (with BCM2837)

1.2

1GB

Embest

a22082

3B

1.2

1GB

Embest

a220a0

CM3

1.0

1GB

Embest

a32082

3B

1.2

1GB

Sony Japan

a52082

3B

1.2

1GB

Stadium

a22083

3B

1.3

1GB

Embest

a02100

CM3+

1.0

1GB

Sony UK

a03111

4B

1.1

1GB

Sony UK

b03111

4B

1.1

2GB

Sony UK

b03112

4B

1.2

2GB

Sony UK

b03114

4B

1.4

2GB

Sony UK

c03111

4B

1.1

4GB

Sony UK

c03112

4B

1.2

4GB

Sony UK

c03114

4B

1.4

4GB

Sony UK

d03114

4B

1.4

8GB

Sony UK

c03130

Pi 400

1.0

4GB

Sony UK

a03140

CM4

1.0

1GB

Sony UK

b03140

CM4

1.0

2GB

Sony UK

c03140

CM4

1.0

4GB

Sony UK

d03140

CM4

1.0

8GB

Sony UK

See More here:

https://www.raspberrypi.org/documentation/hardware/raspberrypi/revision-codes/README.md

Servicing an MindrayPM-8000 Patient Monitor

So this patient monitor was complaining about the clock was off every time it was started, the most obvious problem would be the RTC backup battery for the unit.

I started out by removing the panels that i could find but properly by design they choose not to make this user exchangeable.

The battery neede for the job is an CR1220 3V lithium cell (i always choose batteries from Panasonic for such an task)

First of all Sorry for the crappy picture quality

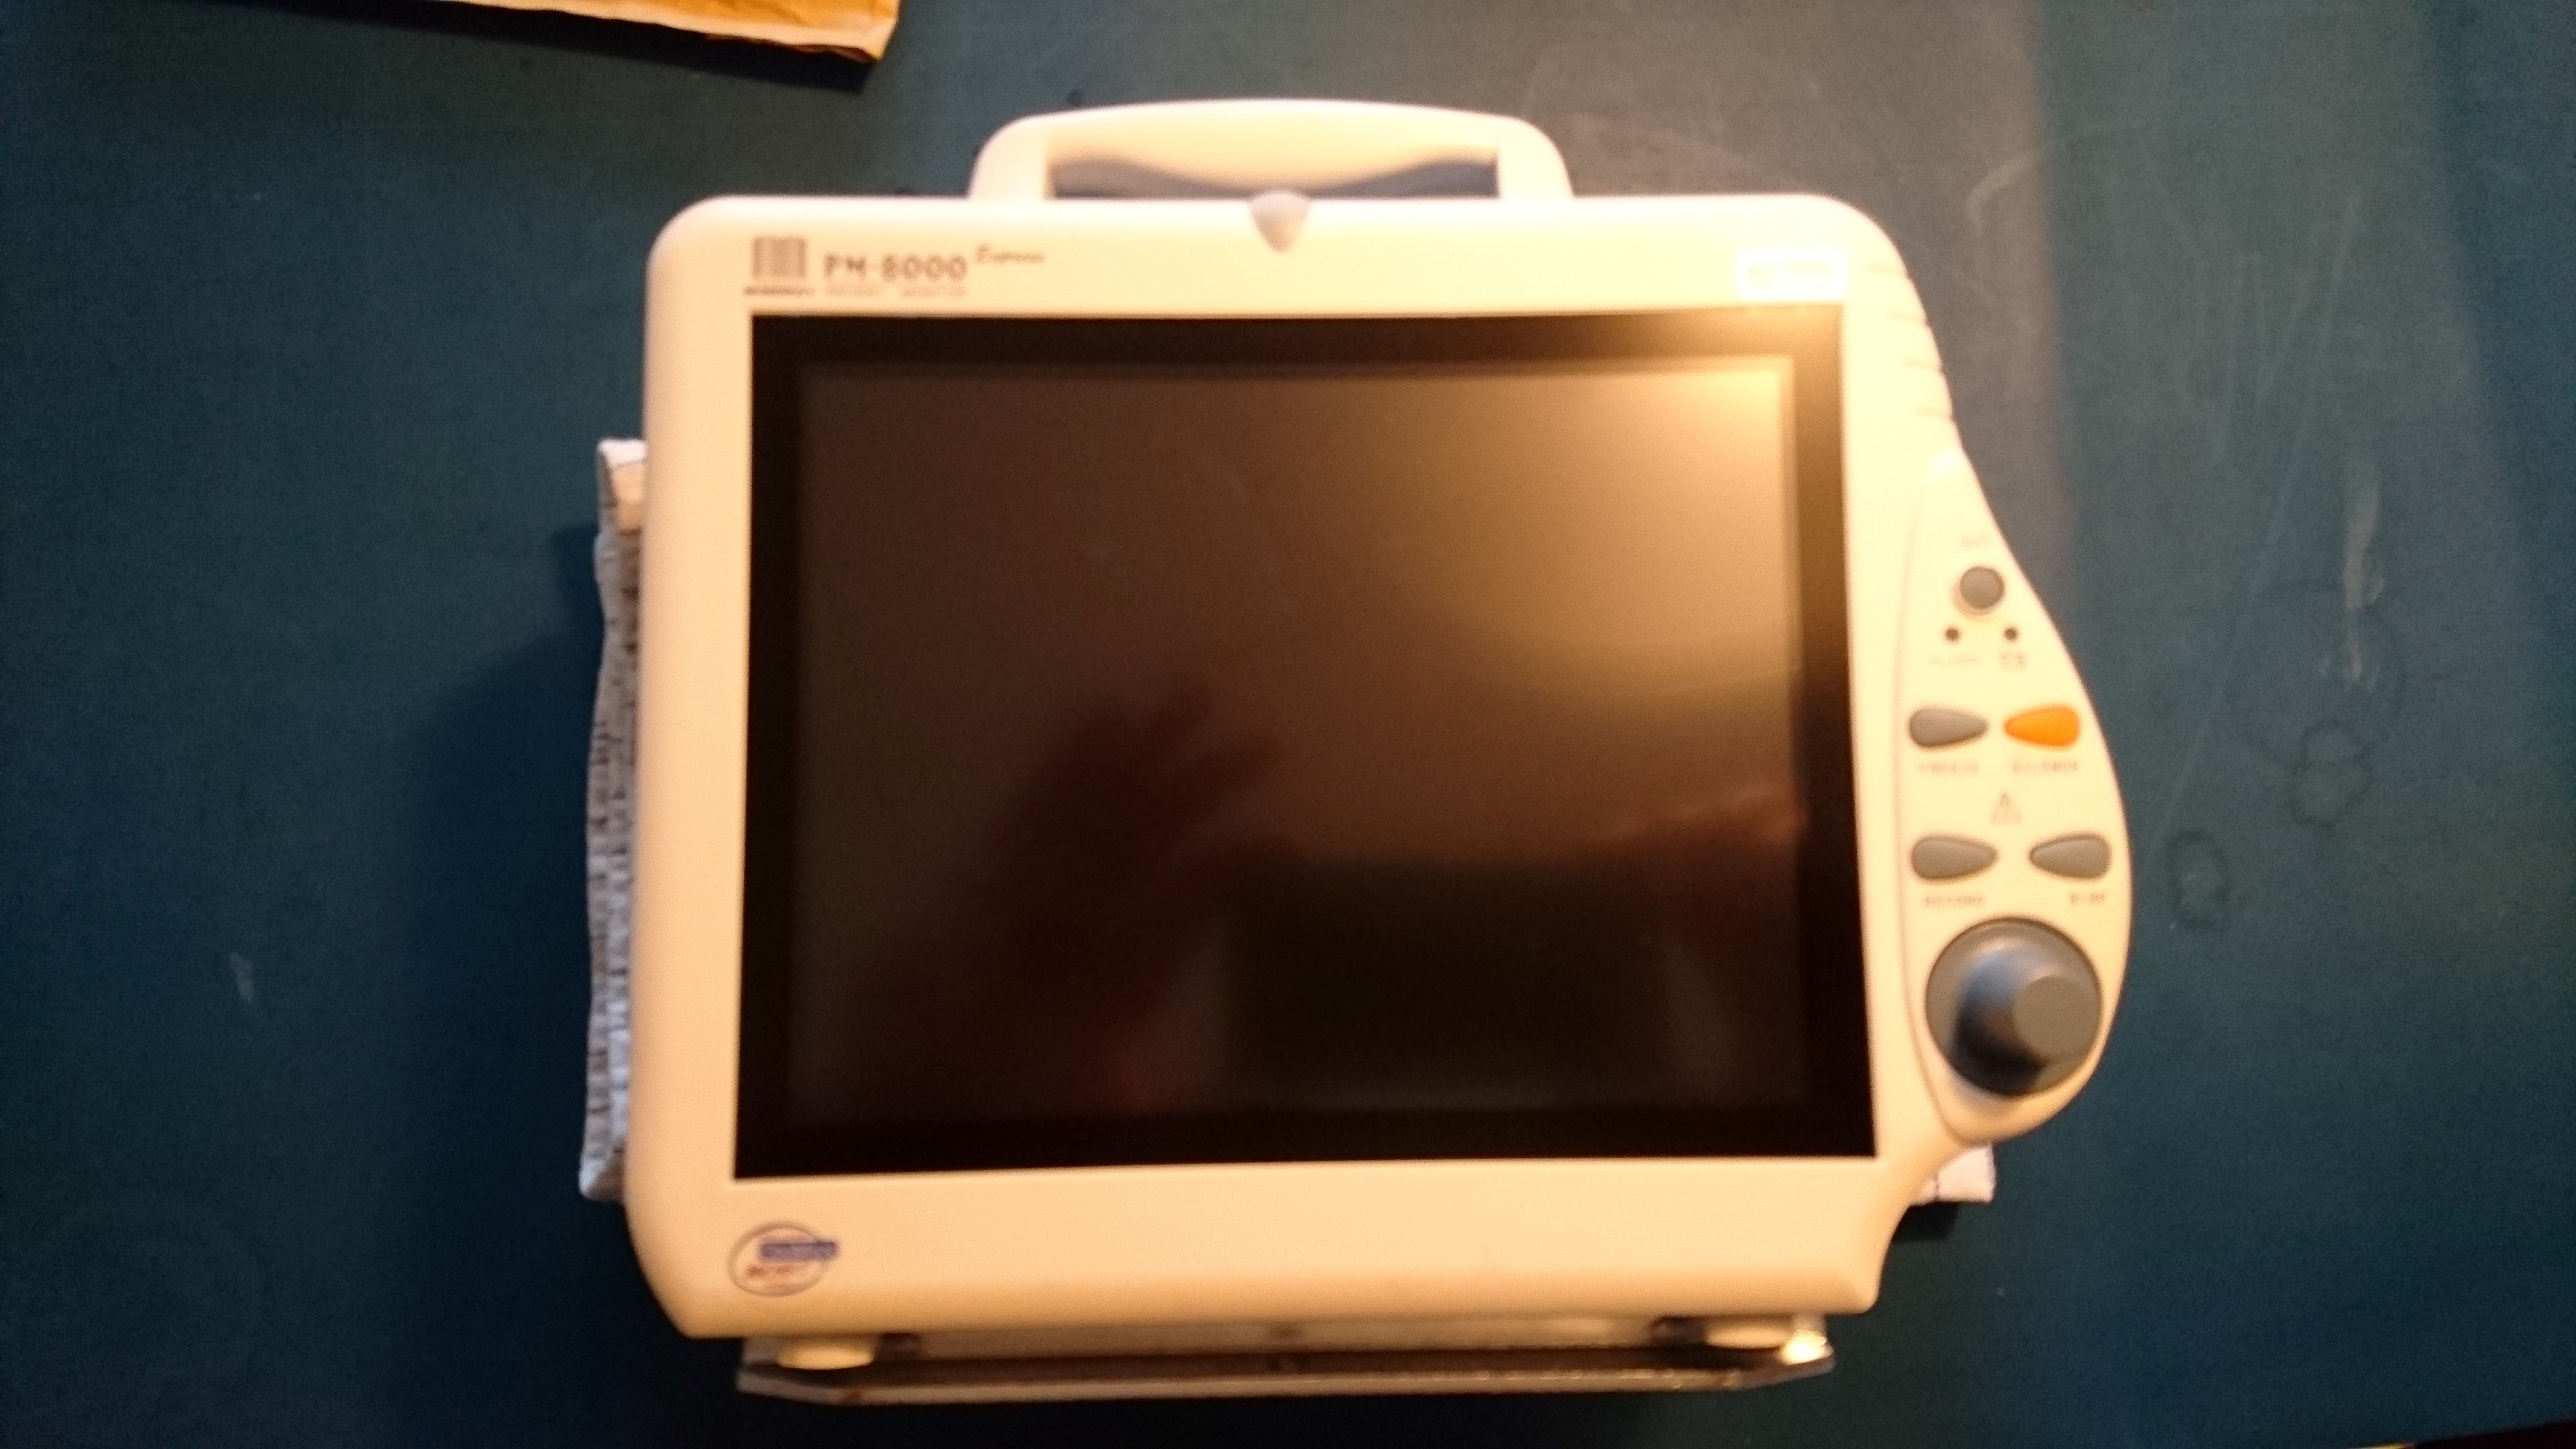
Unit from the front

From the back (yes i removed the serial number on the unit)
You will need to to remove the screws on the back from peel of the front of the unit.

Gently remove the front panel, be careful with the cables, they can be disconnected with ease.

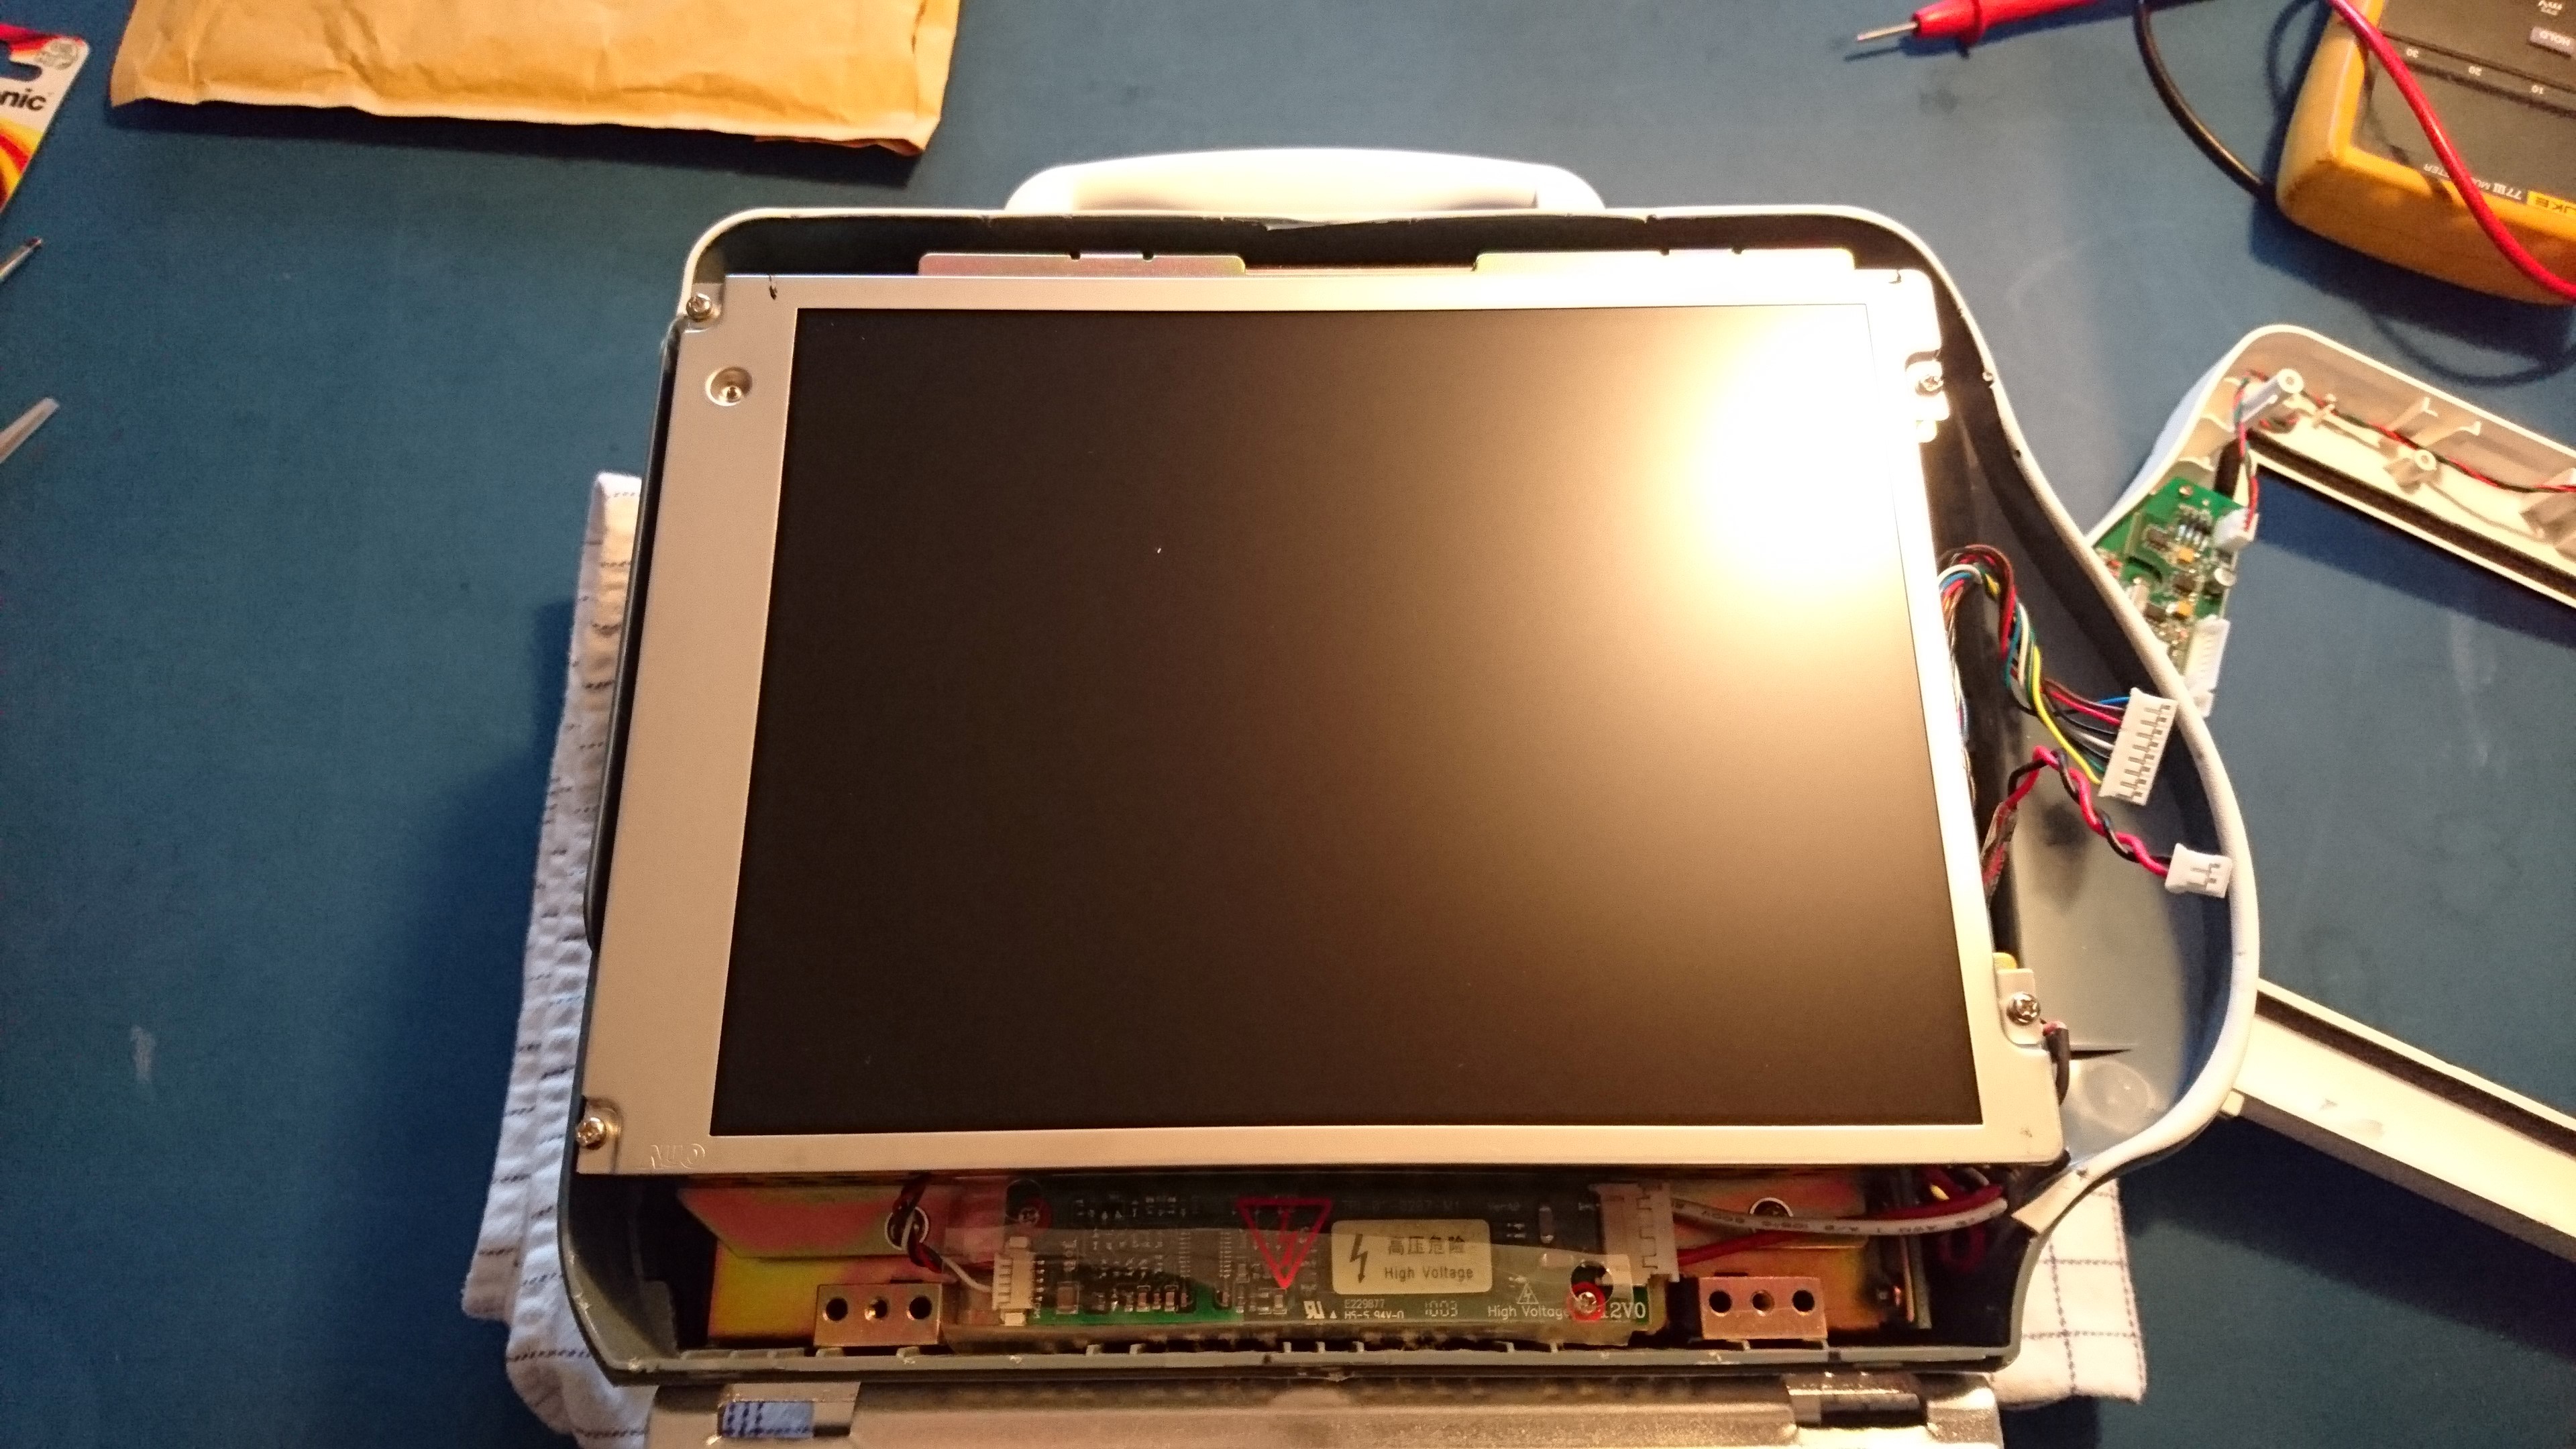
View of the panel.

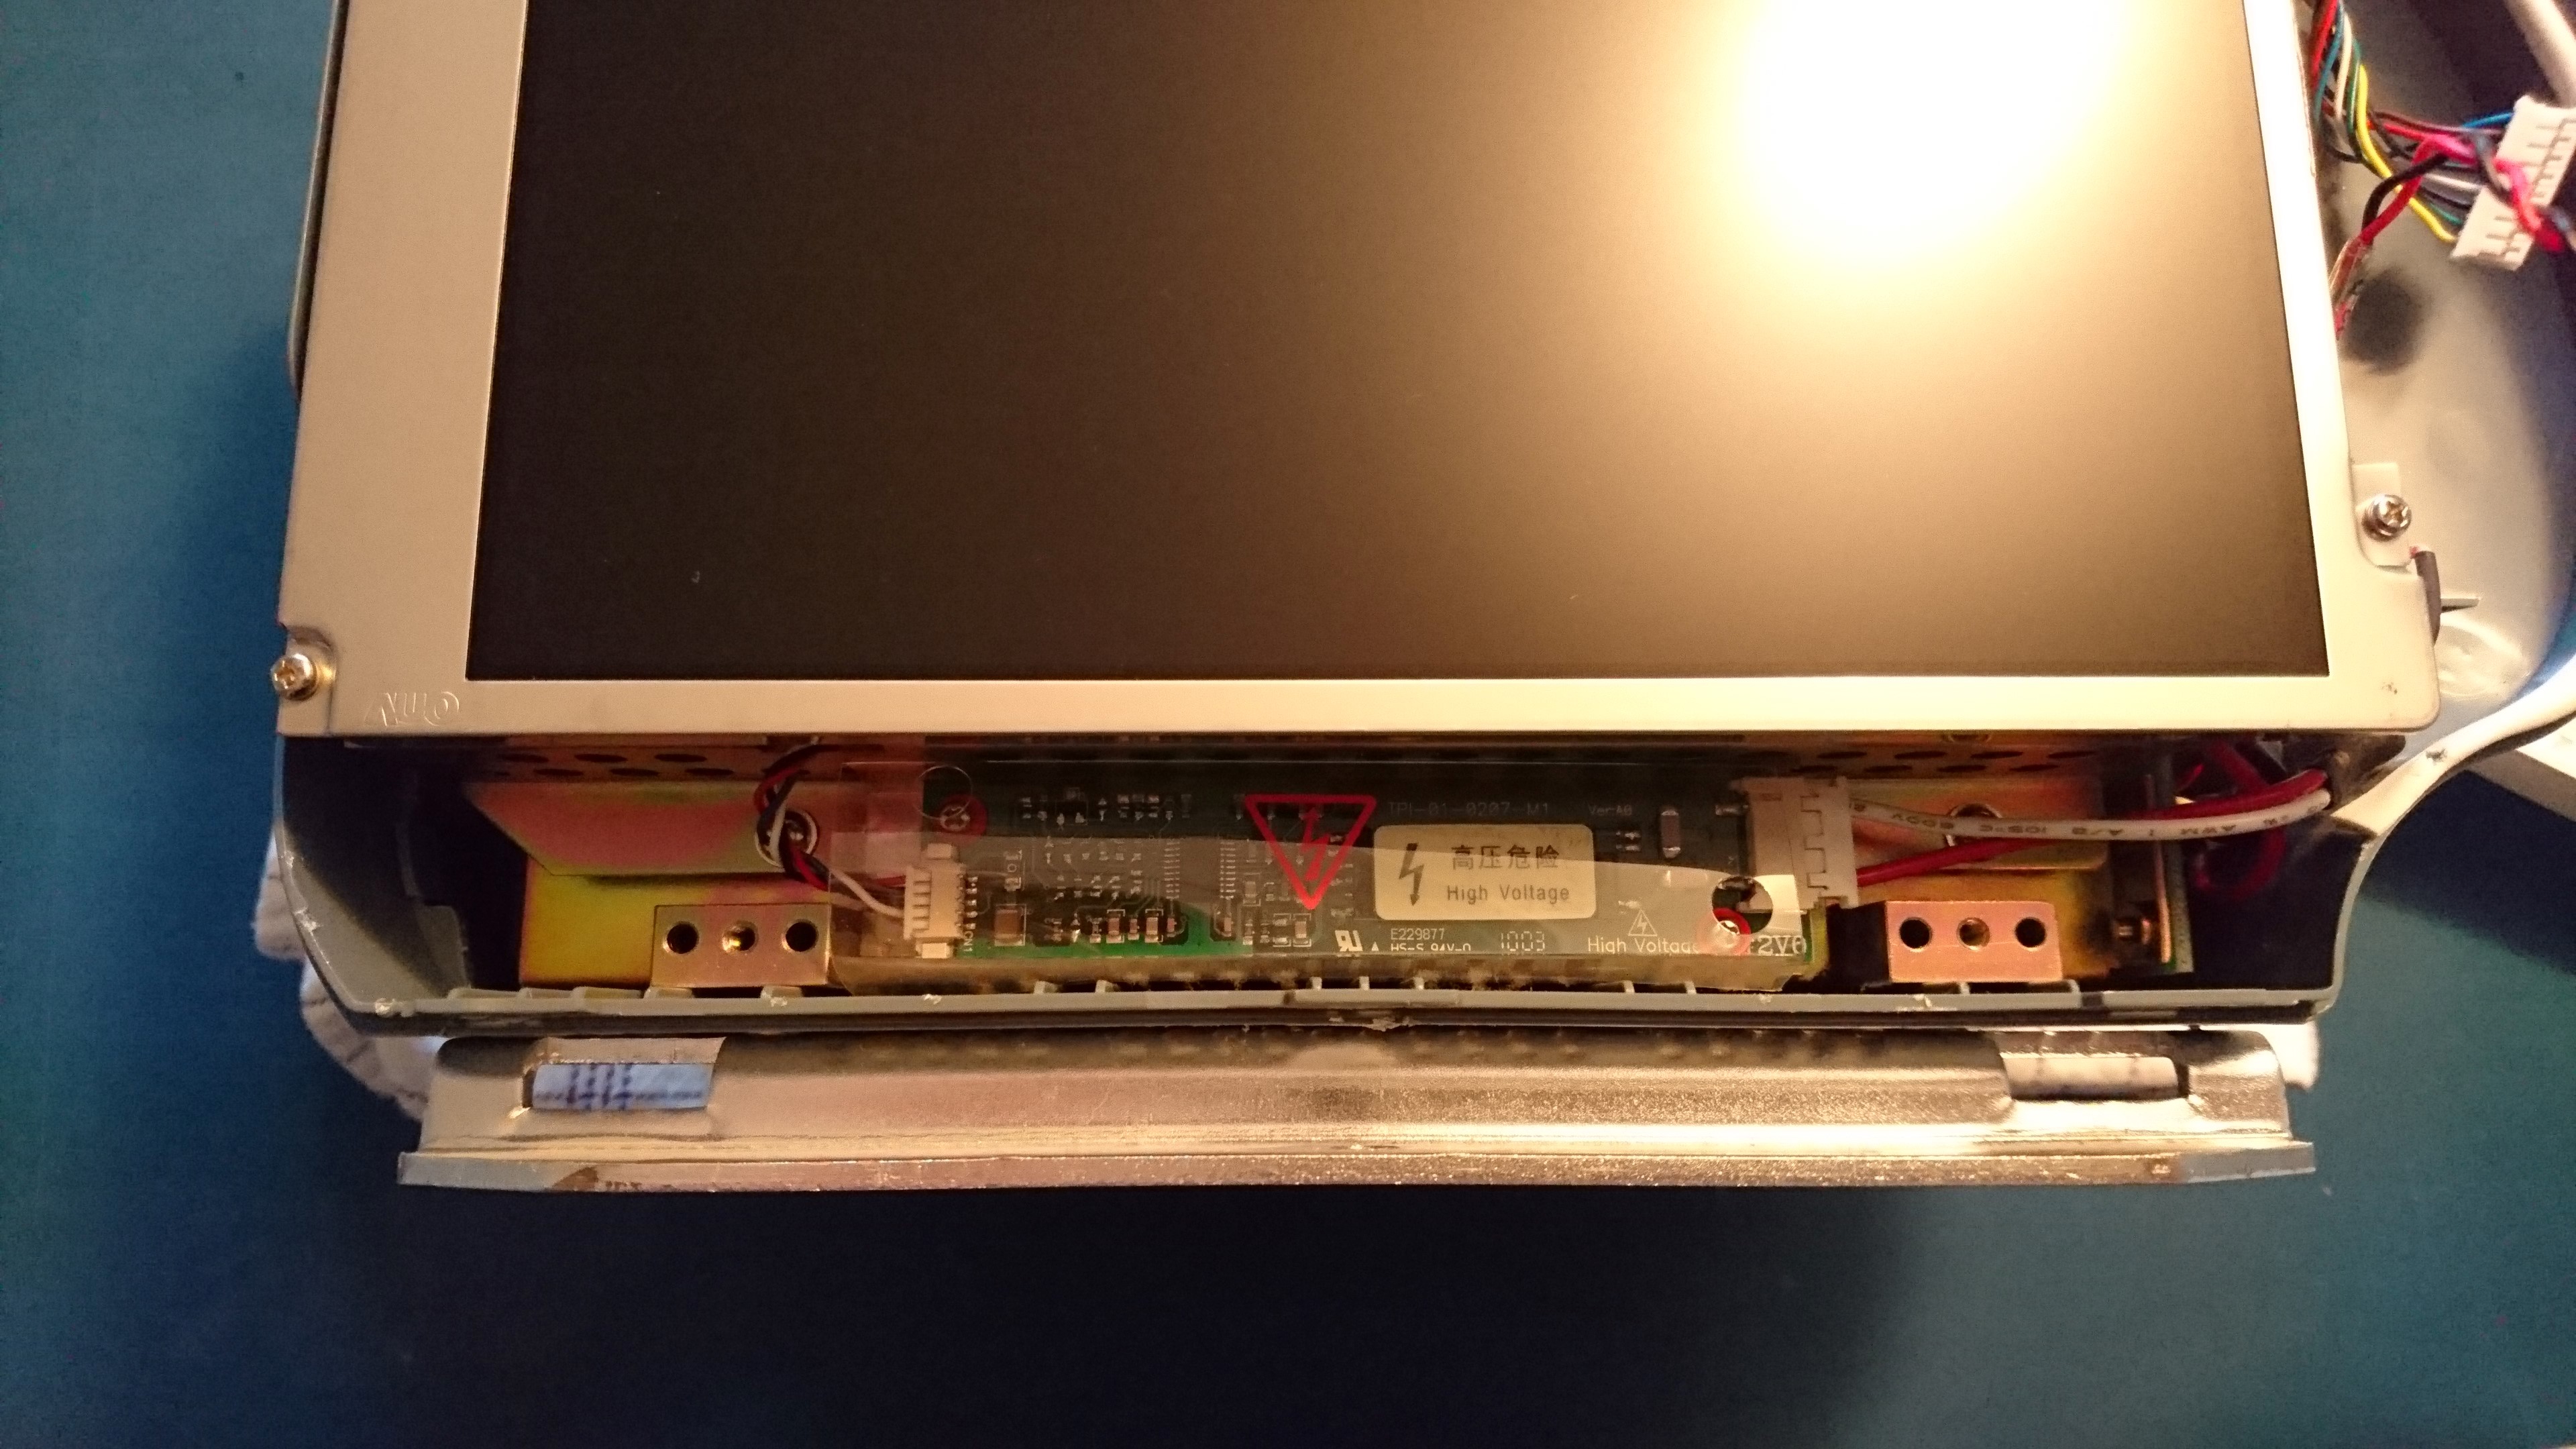
High voltage converter for the CCFL lamp inside the panel

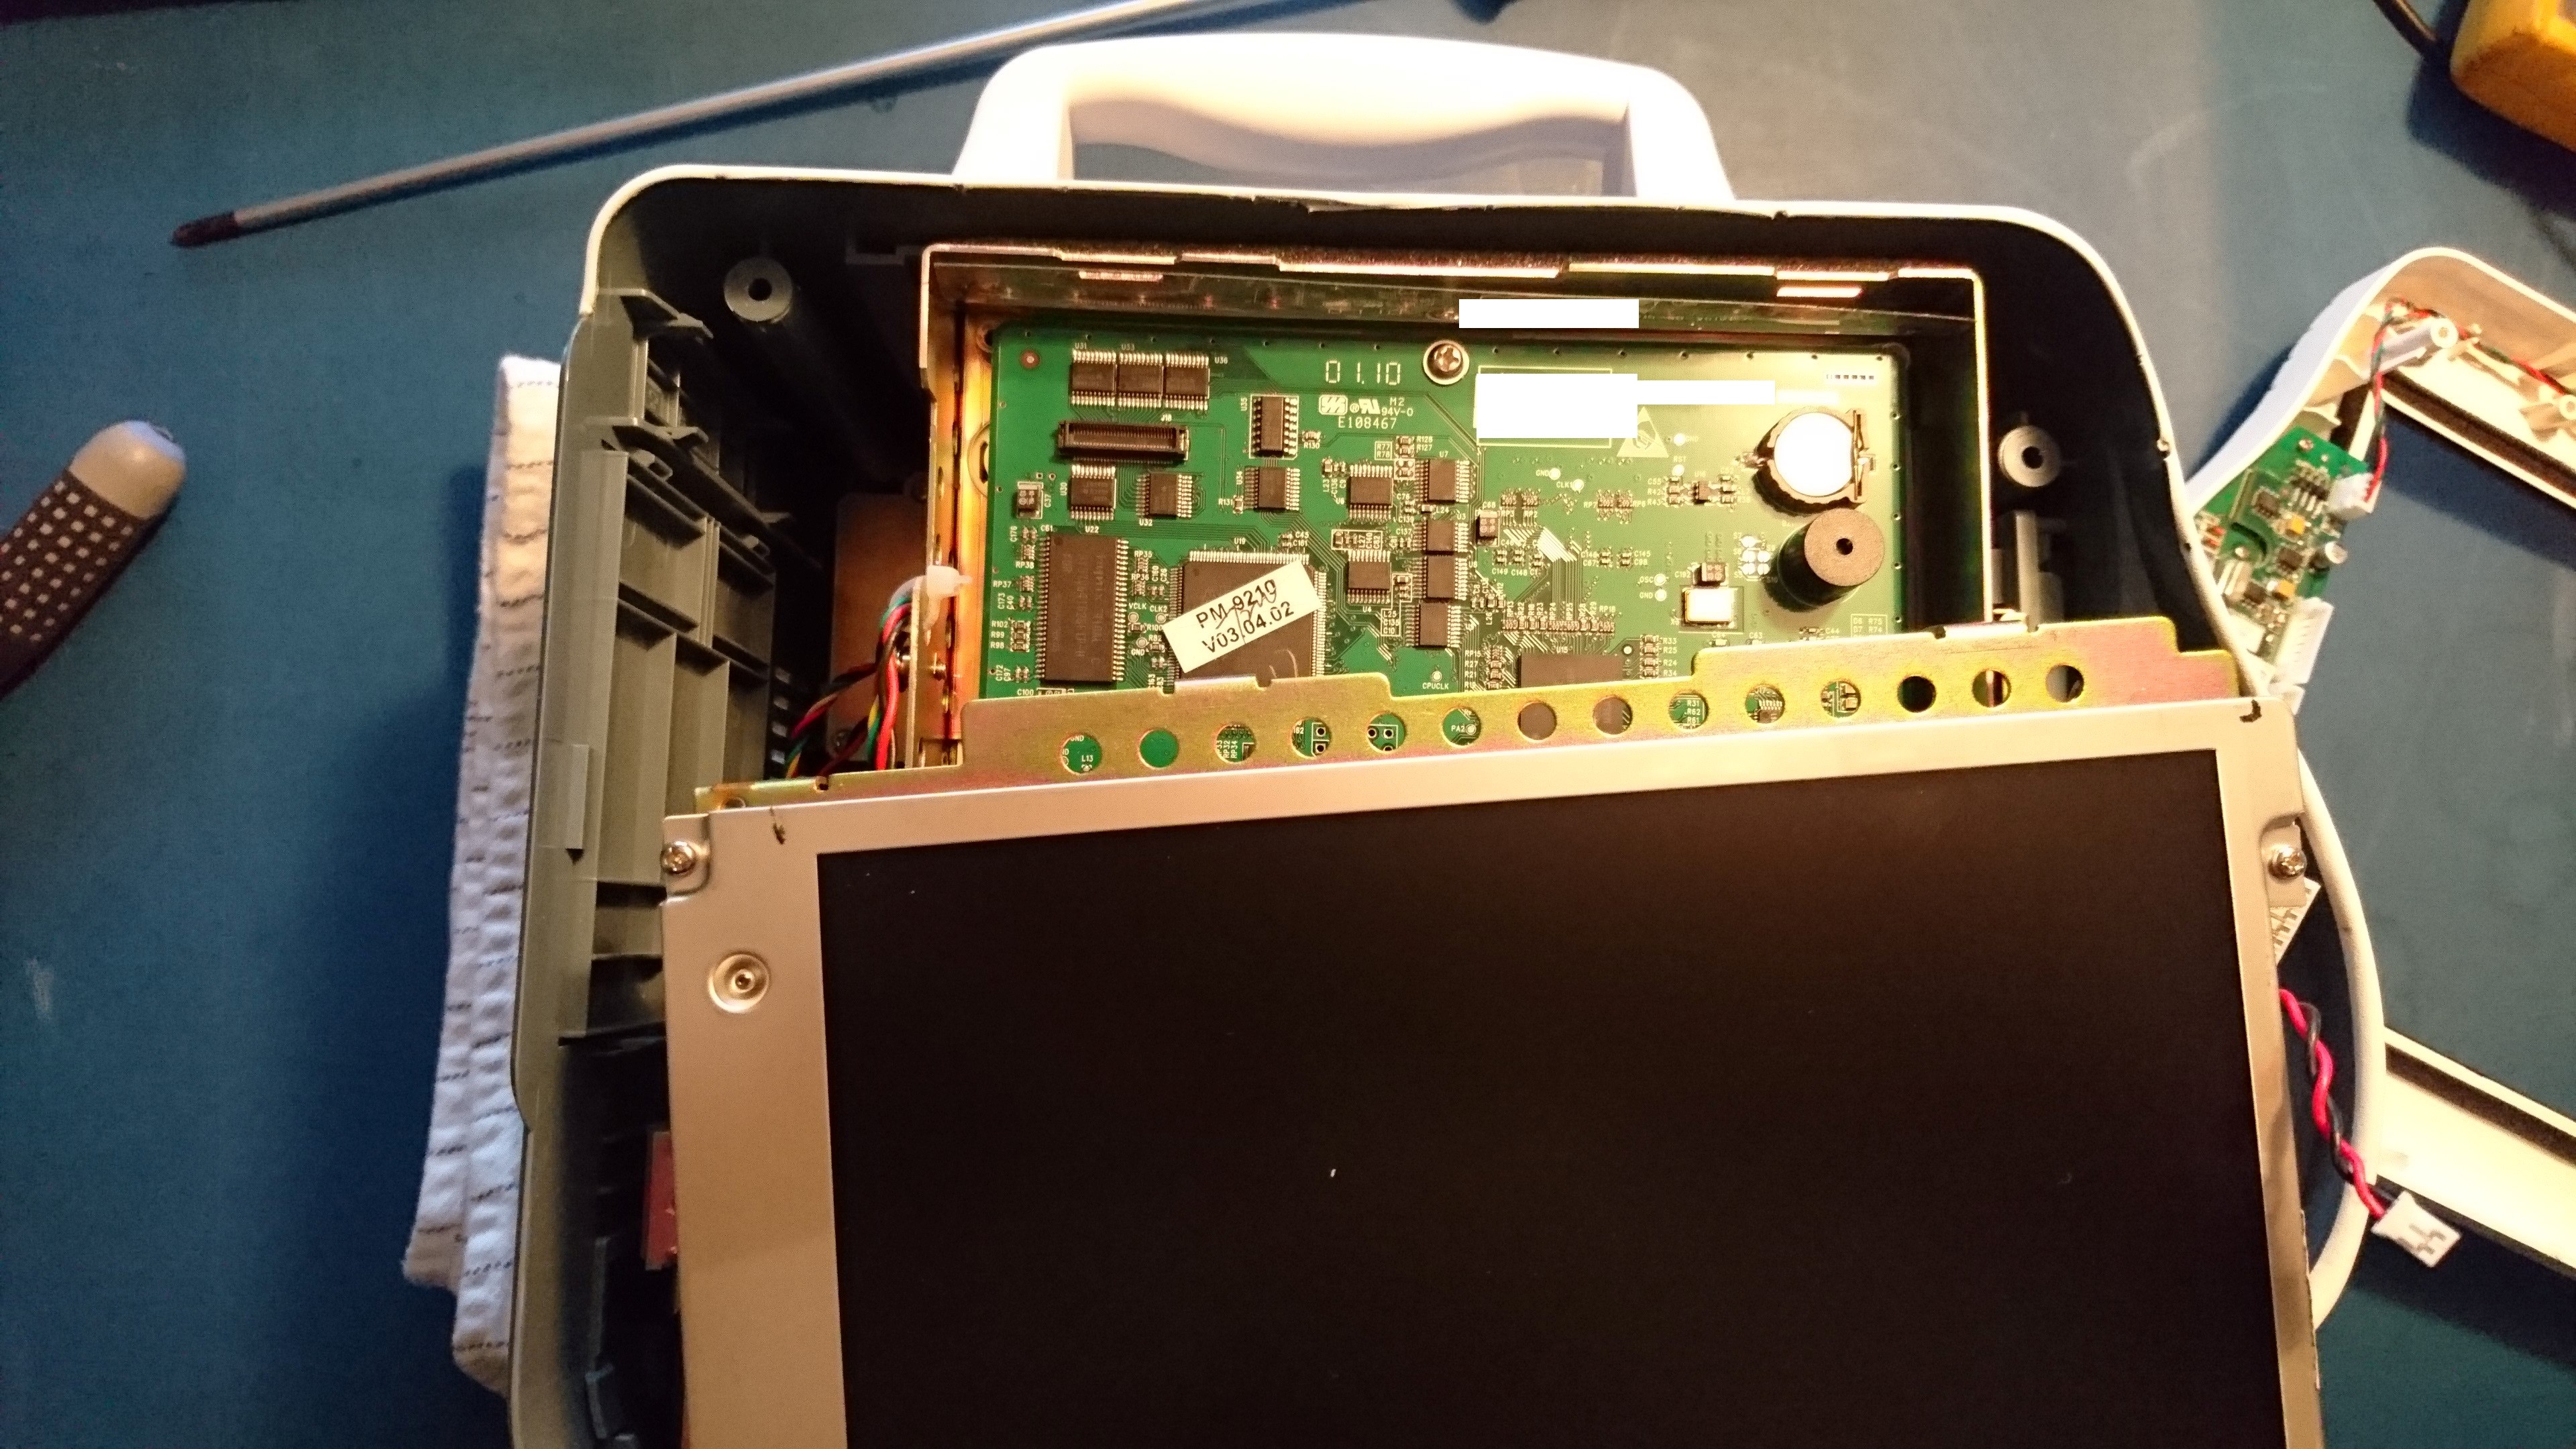
Slide the panel to the side and in an upper left corner the battery is located, pop out the battery and exchange it with the new one (be carefully not to touch the battery use some paper when mounting it.

Reverse the process to assemble the unit.

After the battery have been changed you need to setup the clock again, and this should be it, the new battery should work for the next 7 years, depending on usage.

Reset Windows 7 rearm count


An install of Windows 7 without an activation key allows for 30 days of usage. This can however be extended up to 120 days by using the following slmgr (Software Licensing Management Tool) command to rearm or reset the 30 day trial.

slmgr /rearm

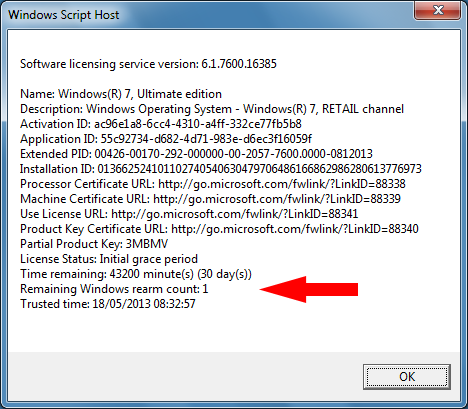
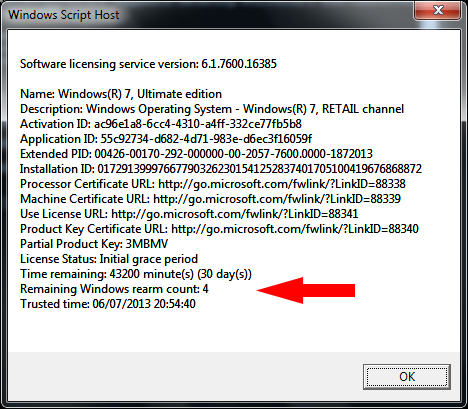
(Remember to run this command, you must right click on cmd and select “Run as administrator” for this to work) However this can only be done up to 4 times. You can view the number of rearm counts by using the command which displays the current license information:

slmgr /dlv

Notice the second to last line shows that I only have 1 more remaining rearm, after which the software will expire. However there is a small trick that allows you to reset the rearm count back to 4. To do this you need delete the registry key which contains the Last Rearm Time, however this key can not be deleted or modified during a normal user session. To delete the key you will need to run the following commands in the windows recovery console.

reg load HKLM\MY_SYSTEM "%~dp0Windows\System32\config\system"
reg delete HKLM\MY_SYSTEM\WPA /f
reg unload HKLM\MY_SYSTEM

To do this save the above commands to a .bat file ‘reset.bat’ to the C:\ root folder. Restart your computer, pressing F8 to get to the Advanced Boot Options. Select the option to Repair Your Computer. Select your keyboard input method. Login with your login details. In the System Recovery Options menu, select Command Prompt. Now type in C:\reset.bat. (If it says “‘C:\reset.bat’ is not a recognised as in internal or external command” message, then it may be because the  C Drive is bring used as a recovery partition. Try again using D:\reset.bat) If successfully you should get the message “The operation completed successfully”. Next reboot your machines.

After rebooting you may get a message stating that this product is not genuine. This can be ignored. Running slmgr /dlv again will confirm that the rearm count has been increased again, thereby giving you another 120 days worth of windows use.

New house and new server room.

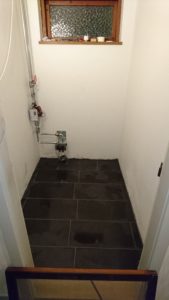
Well I bought an old house from 1965, back in November 2016, and still working on getting all rooms renovated, but one of the more exciting things about the new house, was the possibility to get a dedicated room for my servers, and networking hardware.

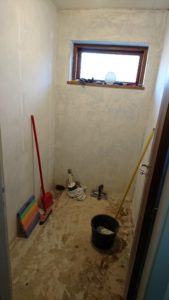
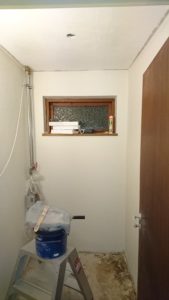
Unfortunately i haven’t got any pictures from the starting point, but the room size is:         120 x 180cm (47,2 x 70.8 inch).

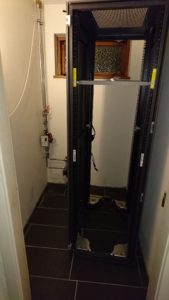
Just big enough to accommodate an 42U 19″ rack, I bought an used HP G10000 G2 Rack of dba.dk got the item for an good price.

Spec for the rack can be found her: http://h18000.www1.hp.com/products/quickspecs/archives_north_america/12402_na_v5/12402_na.html

I have been used to work with the HP G10000 Series rack at work, for numerous customer projects, and really like the mounting options inside the rack, with the D rings and etc.

3/12-2016 Started working on the walls. and adding the new dedicated power for the room, the power will consist of 3 x 13A phases each with it’s own RCD on each phase, this will be more power than i need, but it was the most easy install to do.

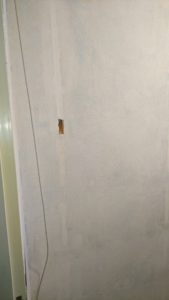
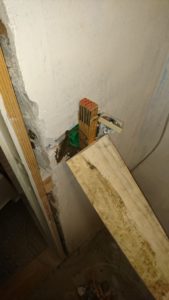
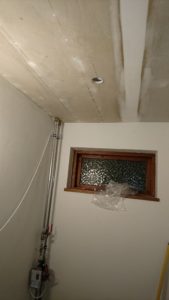
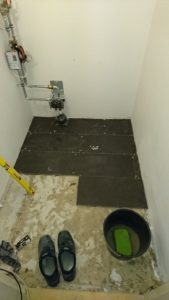
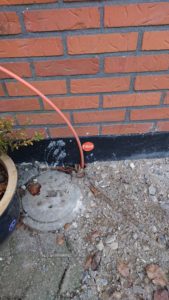
As the picture shows, there is an tubes sticking up from the flooring, this is my district heating that is being installed, unfortunately this was the only option available for getting it in the house without tearing the whole ting down.

4/2-2017: new ceiling made from plaster wall.

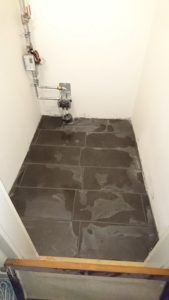
7/2-2017: the heating have been connected and working, it’s time for the flooring 🙂 i decided on tiles, as it should be easy to clean and wipe for any dust

11/2-2017: Time to get the rack in 🙂

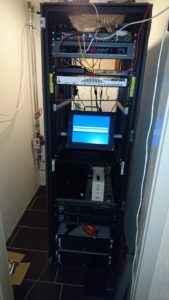
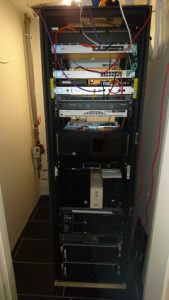
30/3-2017: Time to get some equipment in the rack (I know the cabling is an mess but i needed to get things up and running again.

2/5-2017: Had my new 100/100Mbit FTTH installed today, my secondary line is an VDSL2 (40/12Mbit)

27/5-2017: my cousin installed the new door 🙂 starting to look more finished then ever, still need to do the wiring inside the room and rack.

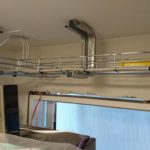
30/7-2017: Decided to install cable trays in the ceiling like the normal trays used in the data centers that i do work in.

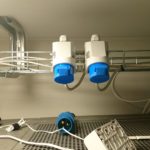
Just missing one power outlet, and mounting of the telephone jack, on the cable tray.

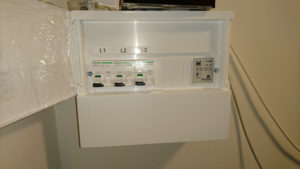
Power distrubution panel (each phase has it’s own RCD and automatic fuse):

31/12-2017: replaced my Ubiquiti Edgerouters and my Zyxel switch, with an USG-PRO-4 Router and 2 switches (US-16-150W and a US‑24) this way i can power my AP’s and further security cameras, the US-24 will mostly do networking for alle the rooms, where i don’t need  POE.

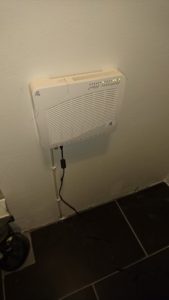
Udskift din TDC Homebox med et modem.

This Article is in danish as it’s primary readers are danish.

TP-Link TD-W9970:

14/06-2024: Efter en omgang torden igen så døde min Askey RTV1800-D79, DSL line driver var toal smeltet og printet skadet så meget at det ikke kunne repareres, jeg har desværre ikke haft held med at source en ny, så alternativet til et modem blev en TP-Link TD-W9970 som er en all-in-one enhed som heldigvis supportere at sætte den i bridge mode.

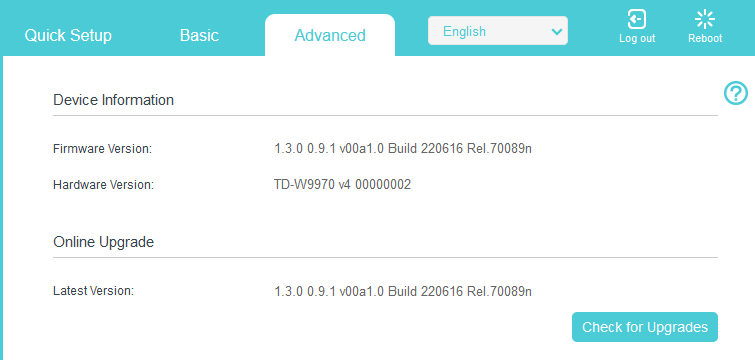
Selve firmware og hardware version kan ses her:OBS: den viste firmware kan ikke findes hvis man går på TP-links hjemmeside og går til deres danske sektion, men derimod kan man se den hvis man tager den internationale, selvom firmwaren er tagget som en EU version.
Mit setup ser således ud og virkede ud af boksen:

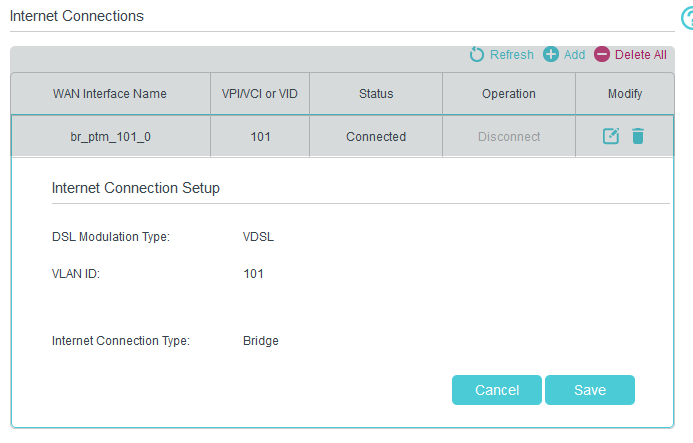
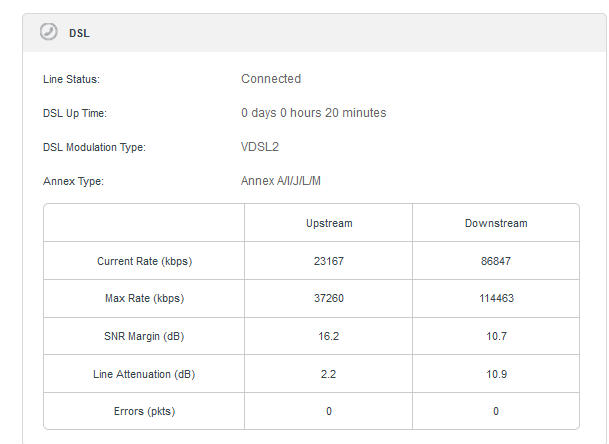
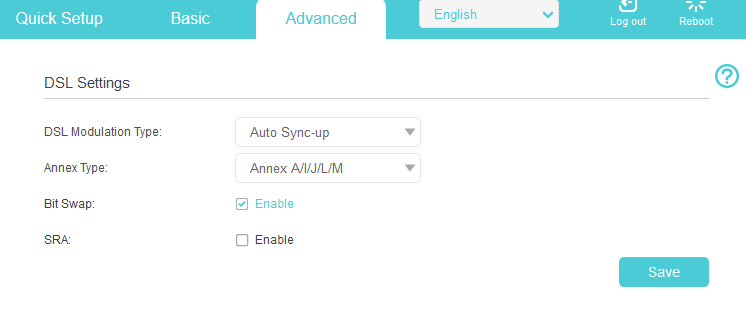
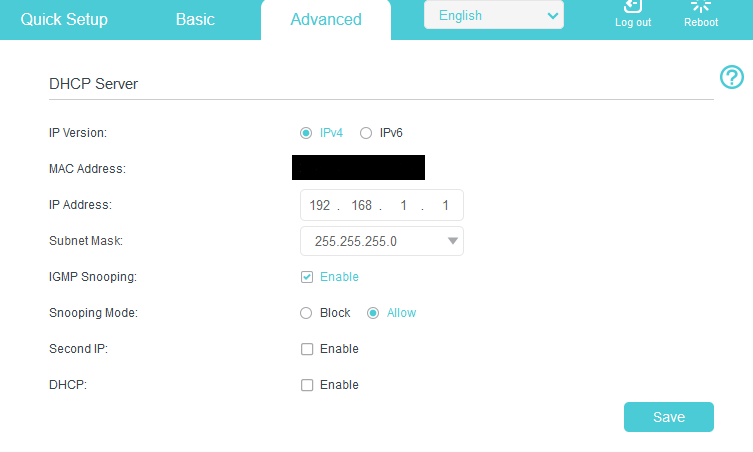
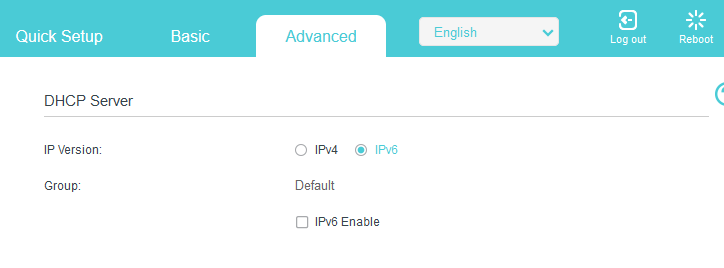
Note: Jeg kørte hurtigt igennem den setup wizard og har som sådan kun lavet små ændringer som at slå DHCP serveren fra samt IPv6 på lan siden, og sætte Annex typen og vlan til 101 som beskrevet i Askey sektionen.

Advanced -> Network -> DSL Settings
Advanced -> Nework -> InternetAdvanced-> Network -> LAN-Settings -> IPv4Advanced-> Network -> LAN-Settings -> IPv6Linjen linket op i første hug:
Askey RTV1800-D79:

22/05-2018 updated: Jeg har smidt min seneste version fil op, efter at jeg måtte sætte et nyt modem op grundet at den Zyxel jeg egenlig have skiftet over til døde efter overspænding på porten og tog en del andet udstyr med i faldet, så snart jeg har en ny Zyxel så smider jeg config op til denne :).

Jeg har i flere år brugt mit eget modem på min TDC ADSL2+ forbindelse (20/2Mbit), i forbindelse med omlægning til en 40/10Mbit forbindelse, blev jeg konverteret til en VDSL2 forbindelse, mit god gamle netgear DM111 ADSL2+ modem, skulle derfor udskiftes til noget som kan forstå VDSL2.

Jeg havde ved et held fået et TDC VDSL2 modem (Askey RTV1800-D79), dette modem understøtter iht. til TDC’s lister både Vectoring, SRA, samt G.INP, hvilket burde sikre driften i langtid.

OBS: jeg har godt nok telefon på mit abb. men jeg bruger det ikke, så disse noter drejer kun om at få internet igennem.

i min naivitet troede jeg at der ikke var forskel på en modem løsning og en router løsning (Homebox), dette viste sig dog at der var stor forskel.

følgende er de settings jeg er bekendt med:

Homebox:
VLAN ID = 101
QOS = 1
VLAN MUX
PTM IPoE

Modem:
VLAN ID = 50
QOS = 0
VLAN MUX
PTM IPoE

Modem settings er fisket ud ved at tilgå http://192.168.1.1 på modemet, Homebox settings er fundet å TDC’s forum.

for at tilgå modem, skal det lige have et spark over benet ved at reset det, hold reset knappen inde indtil at alle lamper blinker, gør dette nogle gange (det kan godt drille), forsøg derefter at tilgå den på 192.168.1.1, når det lykkes skuælle den gerne komme op og spørge om login, her bruger du admin som bruger og password.

man kan via modemet hive settings ud, men umiddelbart ikke ændre noget på denne, dette kan man dog workaround ved at redigere den fil man får ud af settings, jeg ligger hermed min originale fil op samt den redigeret fil som fik min forbindelse til at virke.


Original settings fra modem (TDC Setup): TDC_setup_org.zip

Orginale setting fra modem (Hiper Setup): Hiper_setup_org.zip

De settings jeg kører med idag: working_final_160203.zip

UPDATE nye settings: working_final_180522.zip

NB: Filerne er pakket som ZIP filer, da det gav lidt problemer med encodningen og er derved lige til at smide på boksen.

God fornøjelse med at få det til at spille 🙂

den primære ændring er:

Orginal:

<WANIPConnection instance=”1″>
<Enable>TRUE</Enable>
<ConnectionType>IP_Bridged</ConnectionType>
<Name>br_0_1_1</Name>
<ExternalIPAddress notification=”2″>0.0.0.0</ExternalIPAddress>
<X_BROADCOM_COM_IfName>ptm0.1</X_BROADCOM_COM_IfName>
<X_BROADCOM_COM_ConnectionId>1</X_BROADCOM_COM_ConnectionId>
<PortMappingNumberOfEntries>0</PortMappingNumberOfEntries>
</WANIPConnection>

Modificeret version:

<WANIPConnection instance=”1″>
<Enable>TRUE</Enable>
<ConnectionType>IP_Bridged</ConnectionType>
<Name>br_0_1_1</Name>
<ExternalIPAddress notification=”2″>0.0.0.0</ExternalIPAddress>
<X_BROADCOM_COM_IfName>ptm0.1</X_BROADCOM_COM_IfName>
<X_BROADCOM_COM_ConnectionId>1</X_BROADCOM_COM_ConnectionId>
<X_BROADCOM_COM_VlanMux8021p>1</X_BROADCOM_COM_VlanMux8021p>
<X_BROADCOM_COM_VlanMuxID>101</X_BROADCOM_COM_VlanMuxID>
<PortMappingNumberOfEntries>0</PortMappingNumberOfEntries>
</WANIPConnection>

Jeg vil sandsynligvis skrive mere her ved lejlighed, når jeg får mere tid til at kigge på settings.